
Making a Basic Application Panel
Build your first application panel, post it in your server, and test it end to end.
Prerequisites
Before proceeding, please ensure the following:
- You have
Manage Serverpermissions or higher. - You have invited and configured the Basic Settings from the beginning of this whole guide.
- You have two channels ready: a public one to post the panel in, and a private staff one for submissions.
An application panel is a message your members press to apply for something: staff, moderator, event team, content creator. Their answers land in a channel your review team watches, with Accept and Deny buttons on them.
Free servers keep up to 5 panels. Premium removes that cap.
Create an Application Panel
- Go to the Tickety Dashboard
- Click
Managefor the server you want to configure - In the sidebar, under APPLICATIONS, click Application Panels
- Click Create New Panel
Your first panel opens the Quick Create wizard, which walks the four things a panel cannot go without. You can leave the wizard at any point with Advanced Settings to go straight to the full editor.
Under the button there is a shelf of templates. Staff Application, Moderator Application, Event Staff Application and Content Creator Application come ready made: pick one, give it a name, a channel and a review role, and the messages, questions and settings arrive already filled in. Everything in a template can be changed afterwards.
Video Demonstration:
Configure Panel Basics
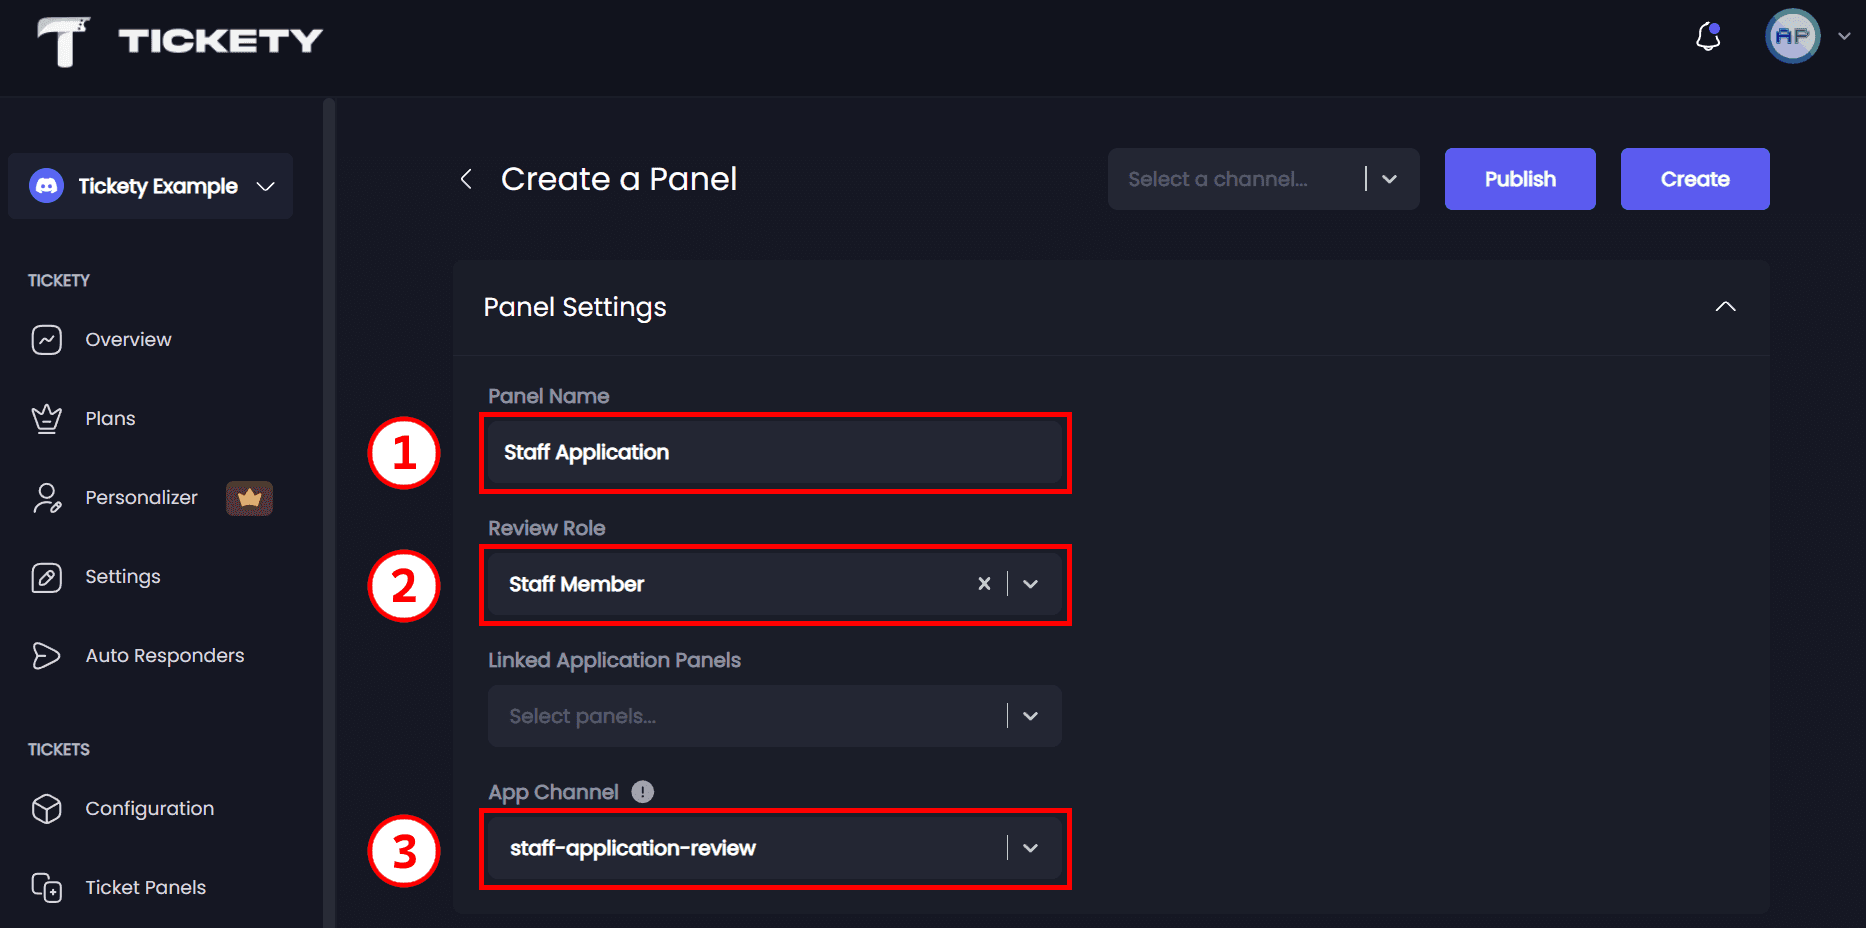
The first wizard step asks for three things:
- Panel Name - The name you and your staff use for this application. Up to 80 characters. It is also the label members see in the
/applydropdown. - Review Role - The one role that reviews applications from this panel. Members with it can accept, deny and view these applications through the commands, even without any Discord permission of their own.
- Application Channel - Where every submission from this panel is posted for your review team. This is not the channel you post the panel in, and not the log channel.
Tip: Save the panel as soon as the basics are in. The save button becomes a floating bar afterwards, which makes saving as you go much easier.
Example:
Customize Panel Message
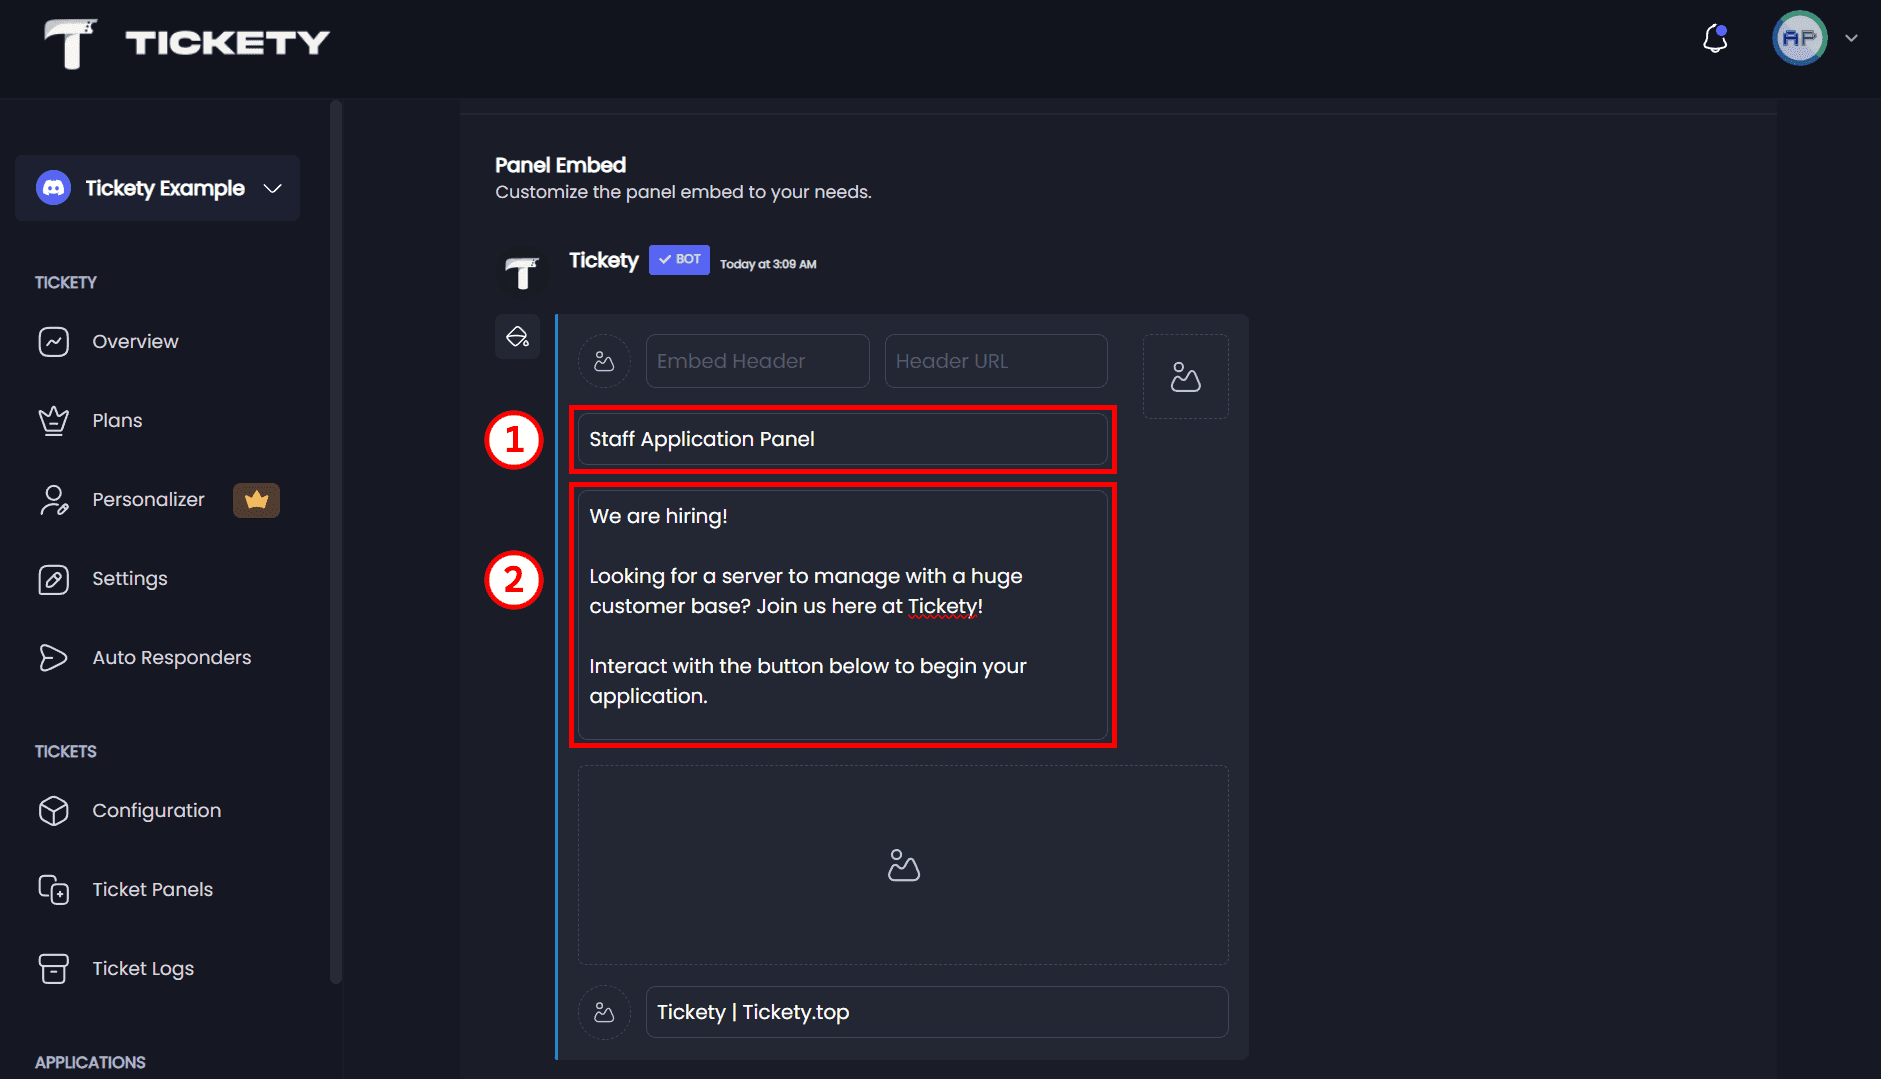
The Panel Message is what members see in the channel where you post the panel. It starts with the title Applications and the description Please click on the button below to start the application process.
Write your own title and description, and say anything an applicant should know before starting: what the role involves, what you expect, how long the answers should be. Under the message you set the button too:
- Button Type -
ButtonorDropdown.Buttonby default. - Panel Button - The label, emoji and colour. Defaults to
Start Applicationwith the 📄 emoji. Labels run up to 80 characters.
Example:
Add your questions
Click Create a Question for each one. The button carries your count, so Create a Question (2/15) means two questions so far. Free servers get 15 per panel, premium gets 25. Drag a question by its handle to reorder it.
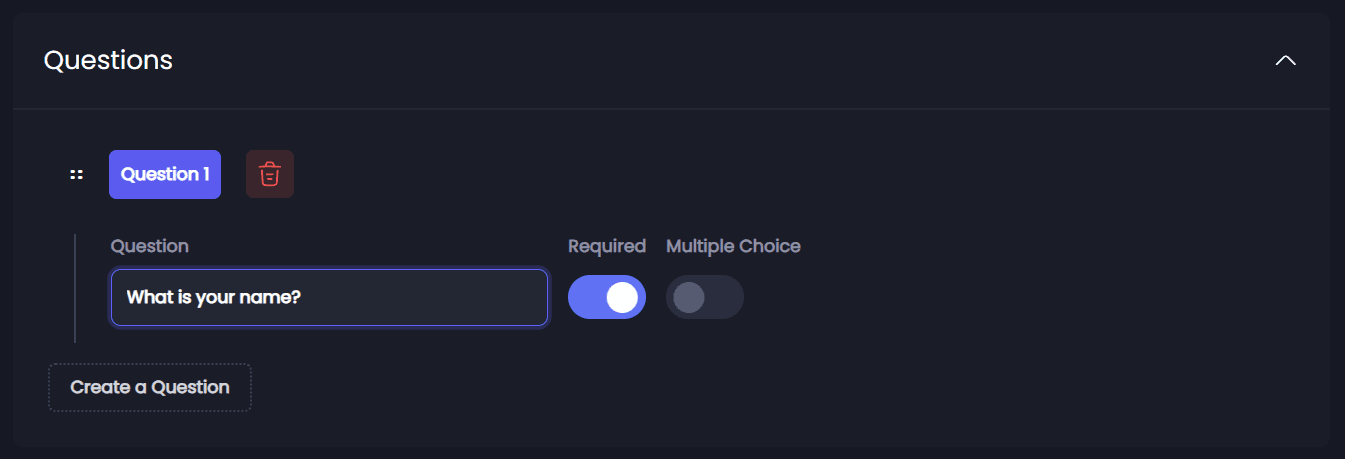
Question 1: Text Answer
- Click Create a Question and write your question, up to 100 characters
- Leave Question Type on
Text Answer - Character Limits sets the shortest and longest answer you accept. It starts at
0 - 1000 characters, and 1000 is the ceiling
Example:
Question 2: Single Choice
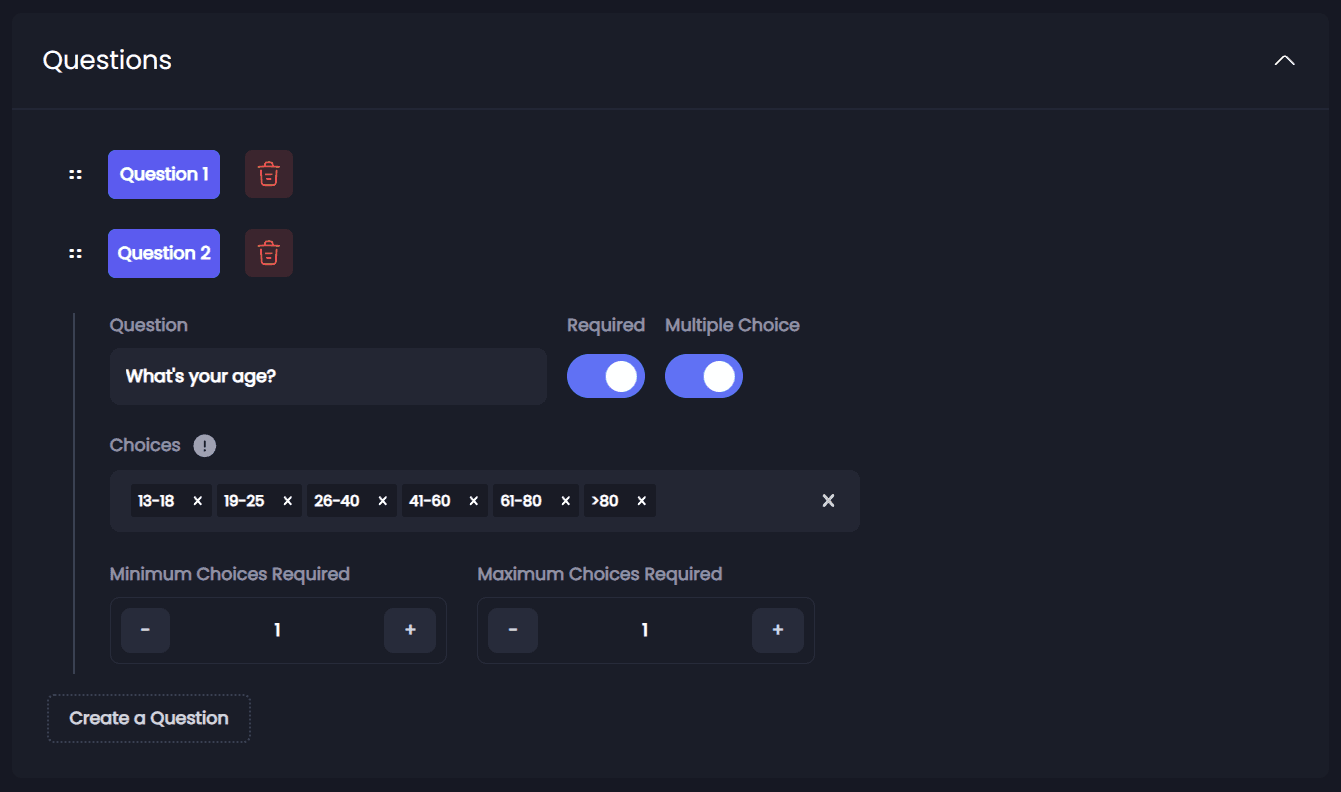
- Add another question and set Question Type to
Multiple Choice - Type each option under Choices and press Enter after each one
- Leave Minimum Choices and Maximum Choices at
1
To add multiple options, type each choice and press Enter. Up to 25 choices fit on one question.
Example:
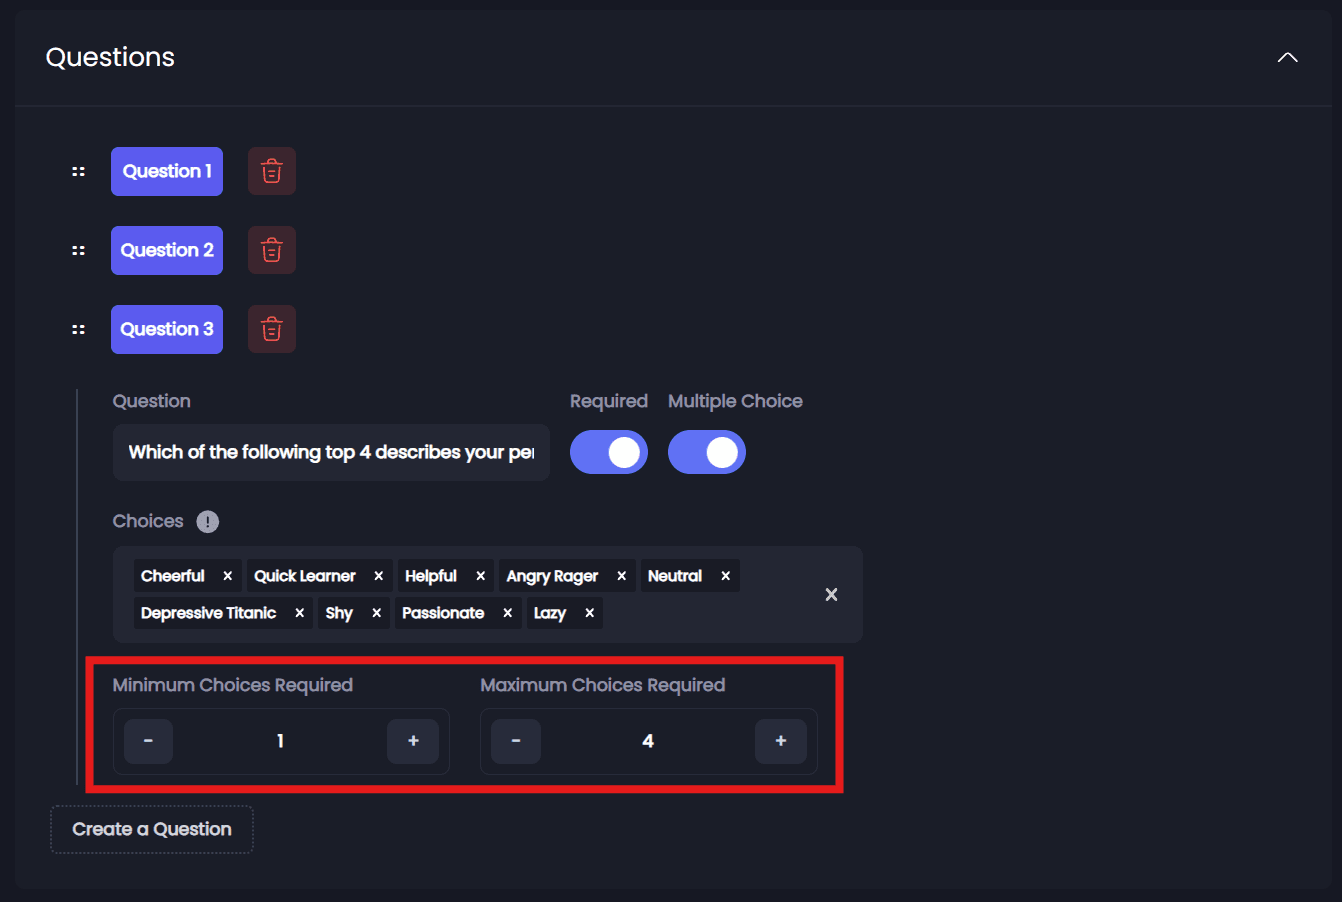
Question 3: Multiple Choice
- Add a third question, set it to
Multiple Choiceand write your options - Set Maximum Choices to 4, or whatever you want the ceiling to be
Control how many options applicants can pick:
- Minimum Choices - The fewest they must pick
- Maximum Choices - The most they may pick
The two move together, so raising the minimum past the maximum pushes the maximum up with it. To ask for two to four answers, set the minimum to 2 and the maximum to 4.
Example:
Set the log channel
Open the Logging tab and set the Log Channel to a private staff channel. This is where this panel writes its record of who applied and who decided what. Left empty, it follows your server's general log channel.
Never use the channel you are about to post the panel in. Every member who can see the panel would then read your review logs. Tickety warns you before it posts a panel into its own log channel, and you should take the warning.
Publish the Application Panel
-
Save the panel. You cannot send it while there are unsaved changes; the save bar shakes at you instead.
-
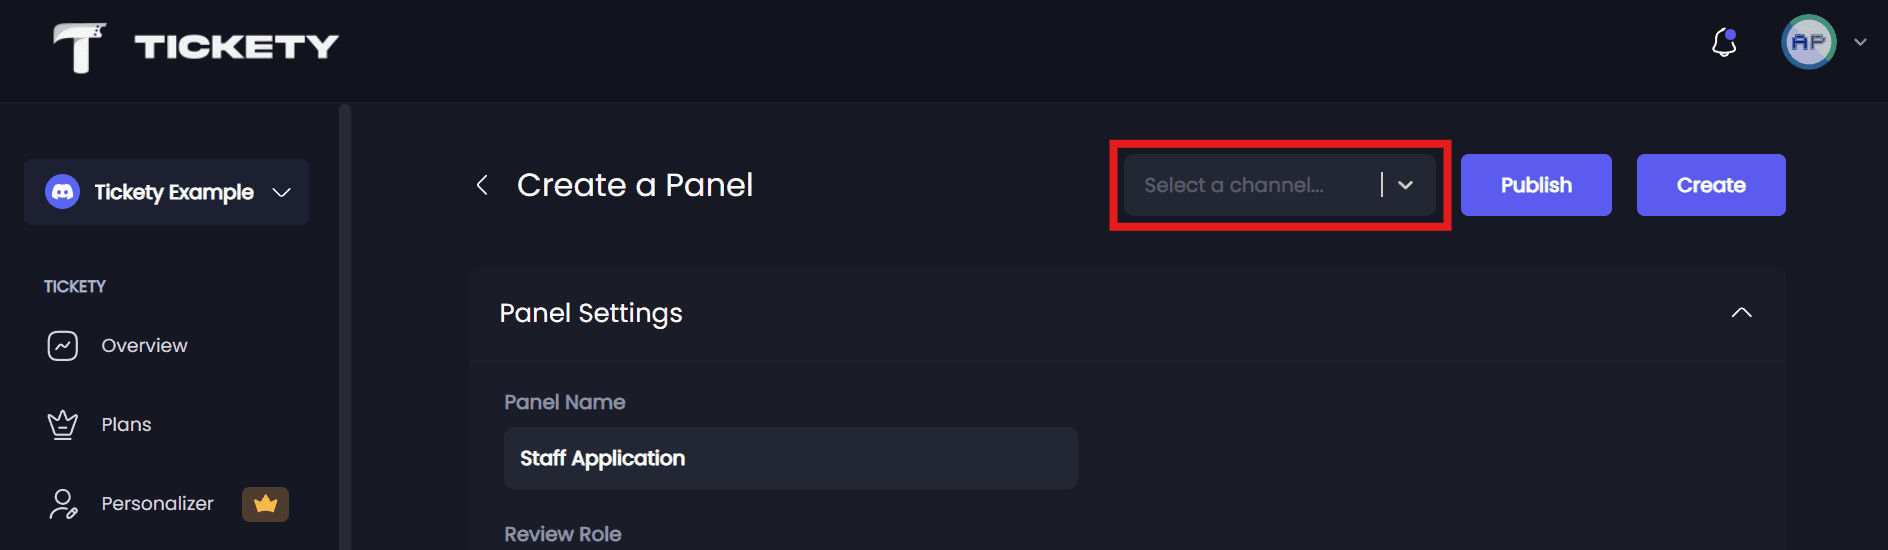
Scroll to the top of the page and open the
Channel to post panel in...dropdown -
Select the channel where you want the panel to appear
-
Click Publish on a new panel, or Send the Panel on one you are editing
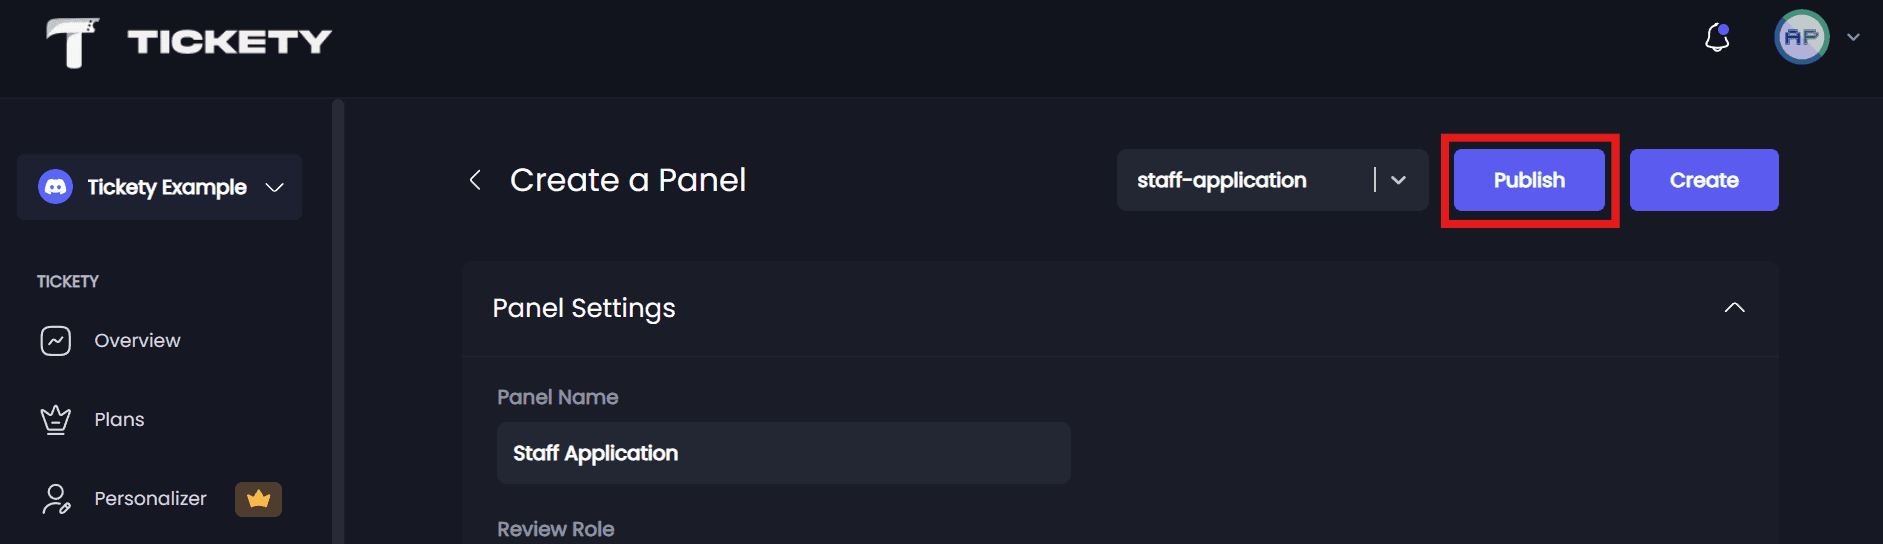
The panel is posted in the channel you picked. Tickety needs View Channel, Send Messages and Embed Links there.
Test the Panel
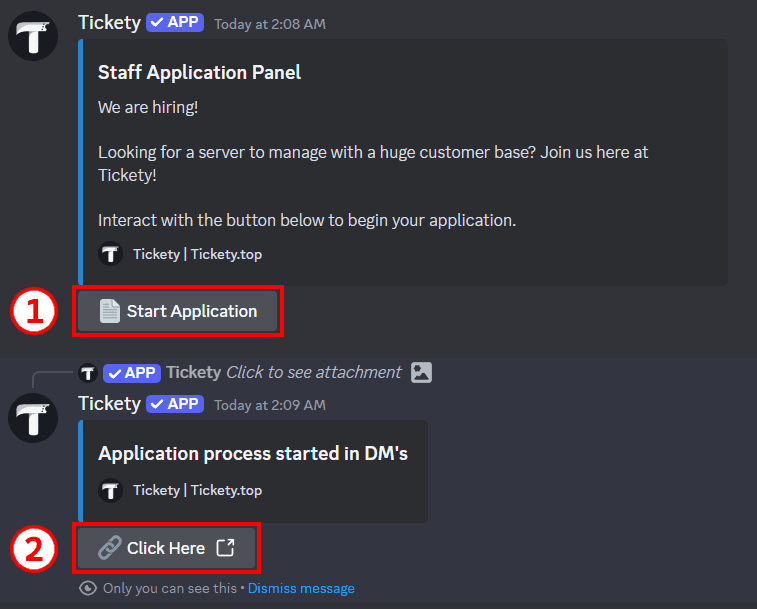
- Go to your Discord server where the panel was posted
- Click Start Application
- You get a private reply, visible only to you, with a View Application button that jumps to the DM
In the DM:
Tickety sends the Information Embed, which asks you to confirm before anything starts. Press Start Application to begin or Cancel to back out.
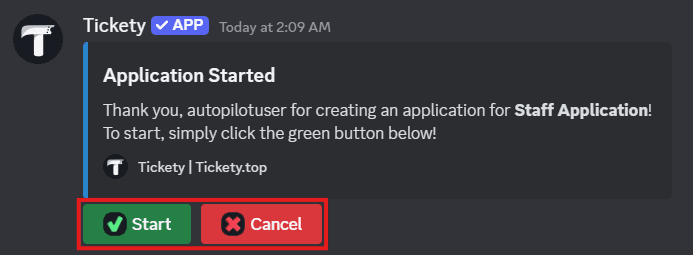
Answering questions:
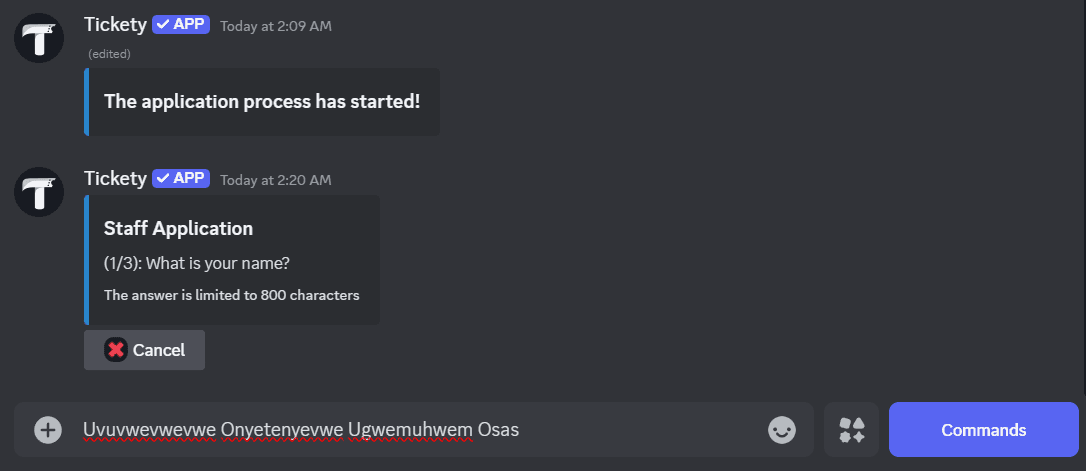
- Text questions: type your answer as a message, inside the character limits you set
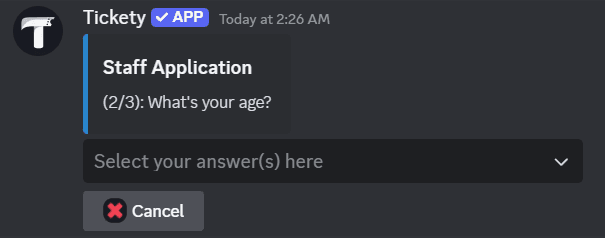
- Choice questions: pick from the dropdown
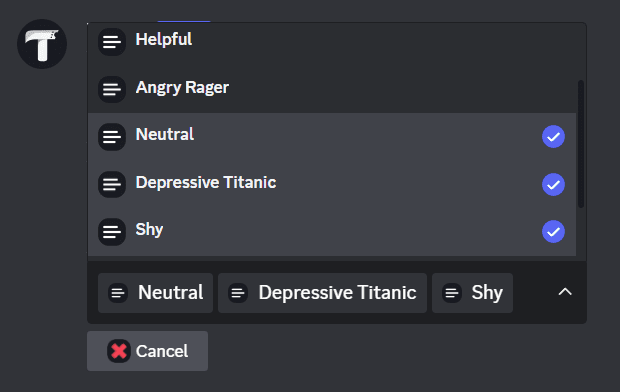
Optional questions carry a Skip button, and Cancel is on every question.
After the last question:
Nothing is sent automatically. The applicant is asked to confirm first, and with Modify Answers Before Submitting 👑 turned on they get a review screen where they can edit any answer before pressing Submit Application.
By default an applicant has 3 hours to finish. They are warned by DM before that runs out and keep an hour after it to submit or cancel.
The submission then lands in your Application Channel with Accept, Deny, User History and Open Interview on it. Anyone with the Review Role can decide.
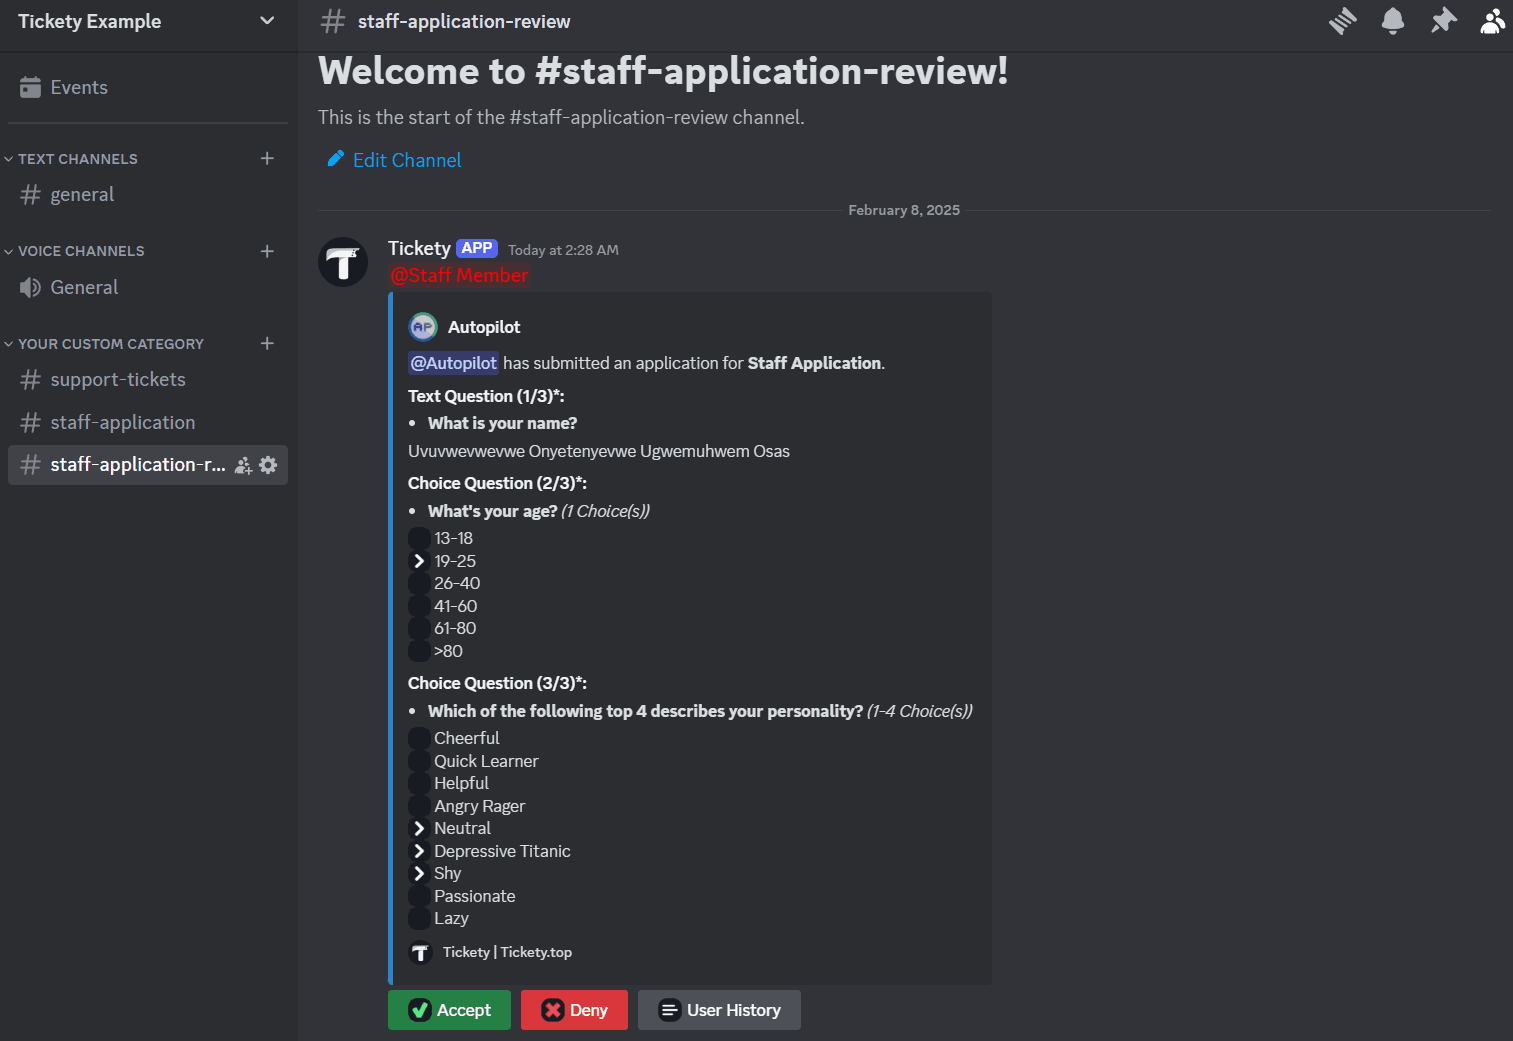
🎉 You have set up and tested a basic application panel with Tickety.
The rest of the panel editor
Once the panel exists, the editor splits into seven tabs. The wizard filled in parts of the first four for you.
| Tab | What lives there |
|---|---|
| General | Application Enabled, the panel name, review role and application channel, plus every application rule: Apply Method, role requirements, Max Pending Applications per User, Submission Time Limit 👑, Application Submission Cooldown, Tag Review Role, Anonymous Reviews and the panel footer 👑 |
| Embed | The Panel Message members see, the button or dropdown, Linked Panels, and the FAQ button |
| Messages | The Information Embed they confirm on, and the Finish Embed they see after submitting |
| Questions | The questions themselves, covered in Application Questions |
| AI | Automatic Application Review, which flags or denies weak submissions before your reviewers reach them |
| Roles | Role Management: roles added or removed automatically on submit, accept or deny |
| Logging | This panel's Log Channel |
Two settings on the General tab are worth knowing early:
- Apply Method - Whether members answer in
Discord DMs, on theWebsite, or pick for themselves withBoth. See Applying in the Browser. - Max Pending Applications per User - How many unreviewed applications one member may have on this panel, from 1 to 10.
1by default.
On the panel list, the menu on each panel card offers Duplicate, Save as Template and Delete Panel. A saved template is kept on your account and can be used in any server you manage.
This feature requires a Premium Subscription.
Where to go next
- Application Questions: every question type, the limits, and what stops a panel saving.
- Applying in the Browser: let members fill the form out on the website instead.
- Reviewing Submissions: how your team accepts and denies what comes in.
- General Settings: the defaults that apply to every panel at once.
- Application Command: let members start an application with
/apply.